
The work you do now units your backyard up for fulfillment sooner or later, and a bit preparation goes a great distance! Raised backyard beds profit from some easy care and upkeep to proceed performing their finest in the course of the rising season. Give them what they want now, they usually’ll thanks for it subsequent spring.
Many of the work to arrange raised backyard beds for winter ensures there are vitamins for future crops. Rising crops dissipate vitamins to flower, fruit, and produce leaves. The beds want time for microbes to break down natural matter and replenish the soil with the misplaced components.
In some areas, winter prep entails planting cold-tolerant crops for cool-season harvests. Leafy greens, root crops, and canopy crops develop nicely in raised beds. Some develop sweeter after frosts. Which of them to plant is determined by the place you reside and the way chilly it will get in the course of the winter.
Learn how to Put together Your Raised Backyard Beds for Winter
Put together your raised backyard beds for winter with these easy steps. It’s simple to do, and you are able to do it in an hour or two in the course of the weekend or after work. You’ll want mulch, gloves, and a few frost safety should you’re rising crops.
Step 1: Clear the Beds
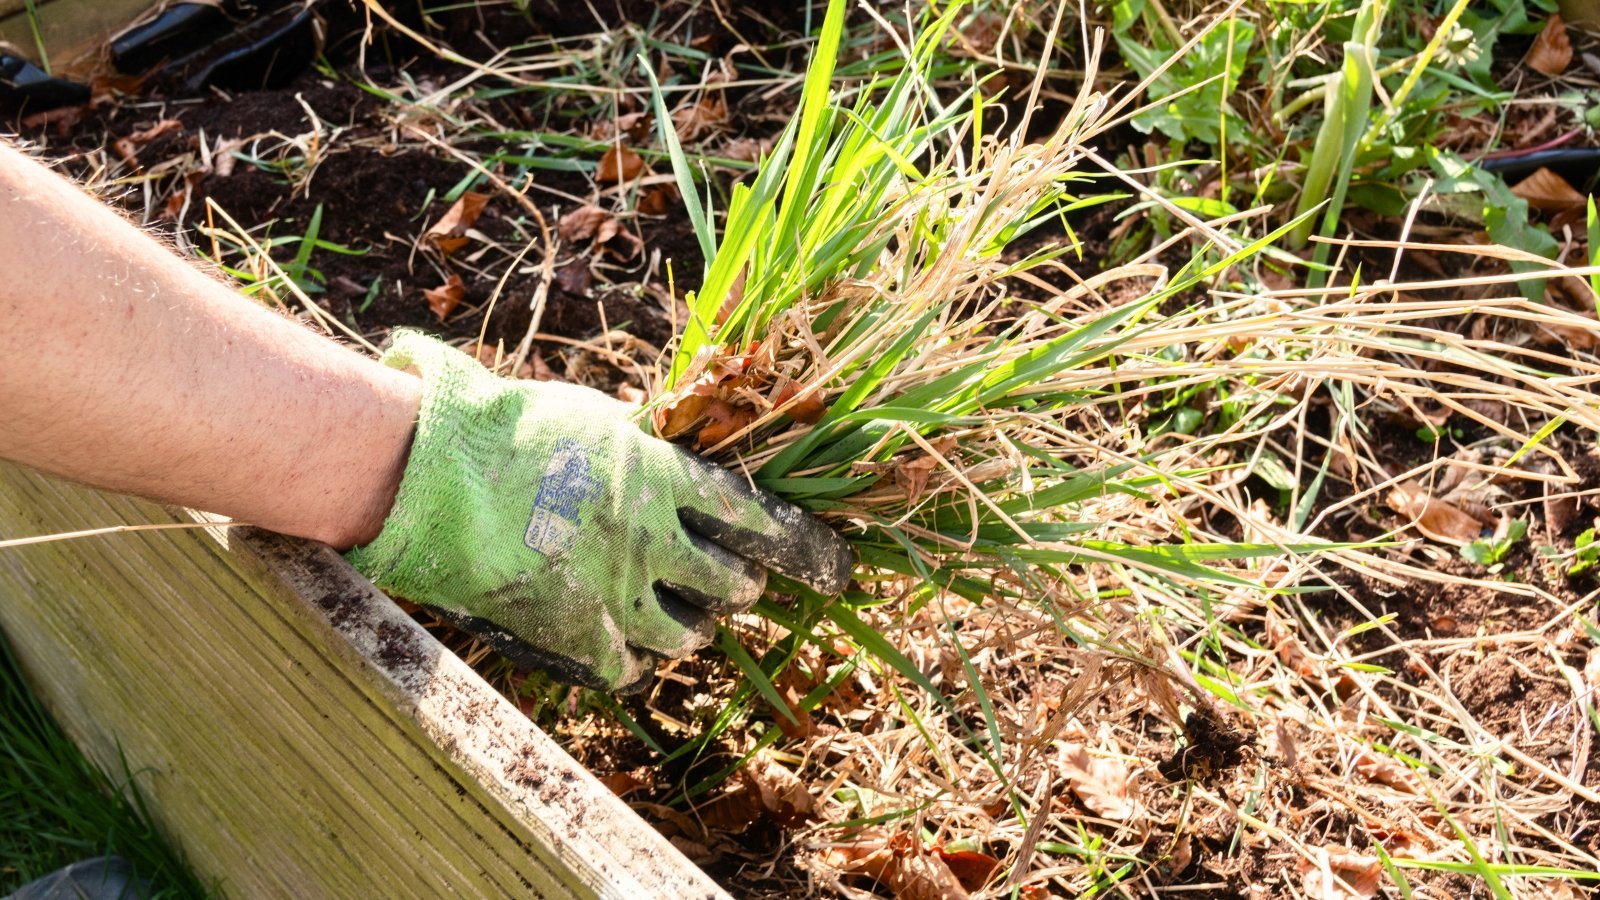
This primary step is essential! It’s necessary to take away annuals, spent foliage, and weeds. Reduce crops down at their base as a substitute of pulling them out. For those who depart the roots within the soil, they’ll decompose and replenish the beds with rotting natural matter.
Weeds act as vectors for pests and illnesses. They will unfold to your different crops and trigger infections subsequent 12 months. Take away them promptly, and look ahead to quick-growing cool-season weeds, like furry bittercress.
Watch out to not disturb the world beneath the soil’s floor. You’ll wish to protect the fungi, micro organism, and worms that stay underground. Tilling can destroy them and result in fertility issues sooner or later.
Whilst you’re eradicating annuals and weeds, take care to not disturb your perennials. Mark them with sticks so that you don’t overlook the place they’re. Merely stab a stick subsequent to the perennial so it juts out of the bottom.
Step 2: Save Tender Vegetation

Different perennials received’t survive the winter, like sure bulbs and frost-tender specimens. You’ll wish to dig them up for overwintering indoors, in a chilly body, or in a greenhouse. Bulbous perennials like dahlias and tuberous begonias want a chilly, darkish, and dry setting to overwinter.
Different crops, like peppers, can proceed rising if they’ve heat temperatures, daylight, and constant moisture all through the chilly months. Don’t loosen the soil from their roots; as a substitute, dig them up and pot them in containers.
If pests are on the leaves, it’s finest to take away them earlier than bringing your crops indoors. Use neem or horticultural oil in a liquid answer, and spray it so it covers all components of the crops. Do that in an open space away from any late-blooming flowers to keep away from harming pollinators.
Step 3: Add Loads of Mulch
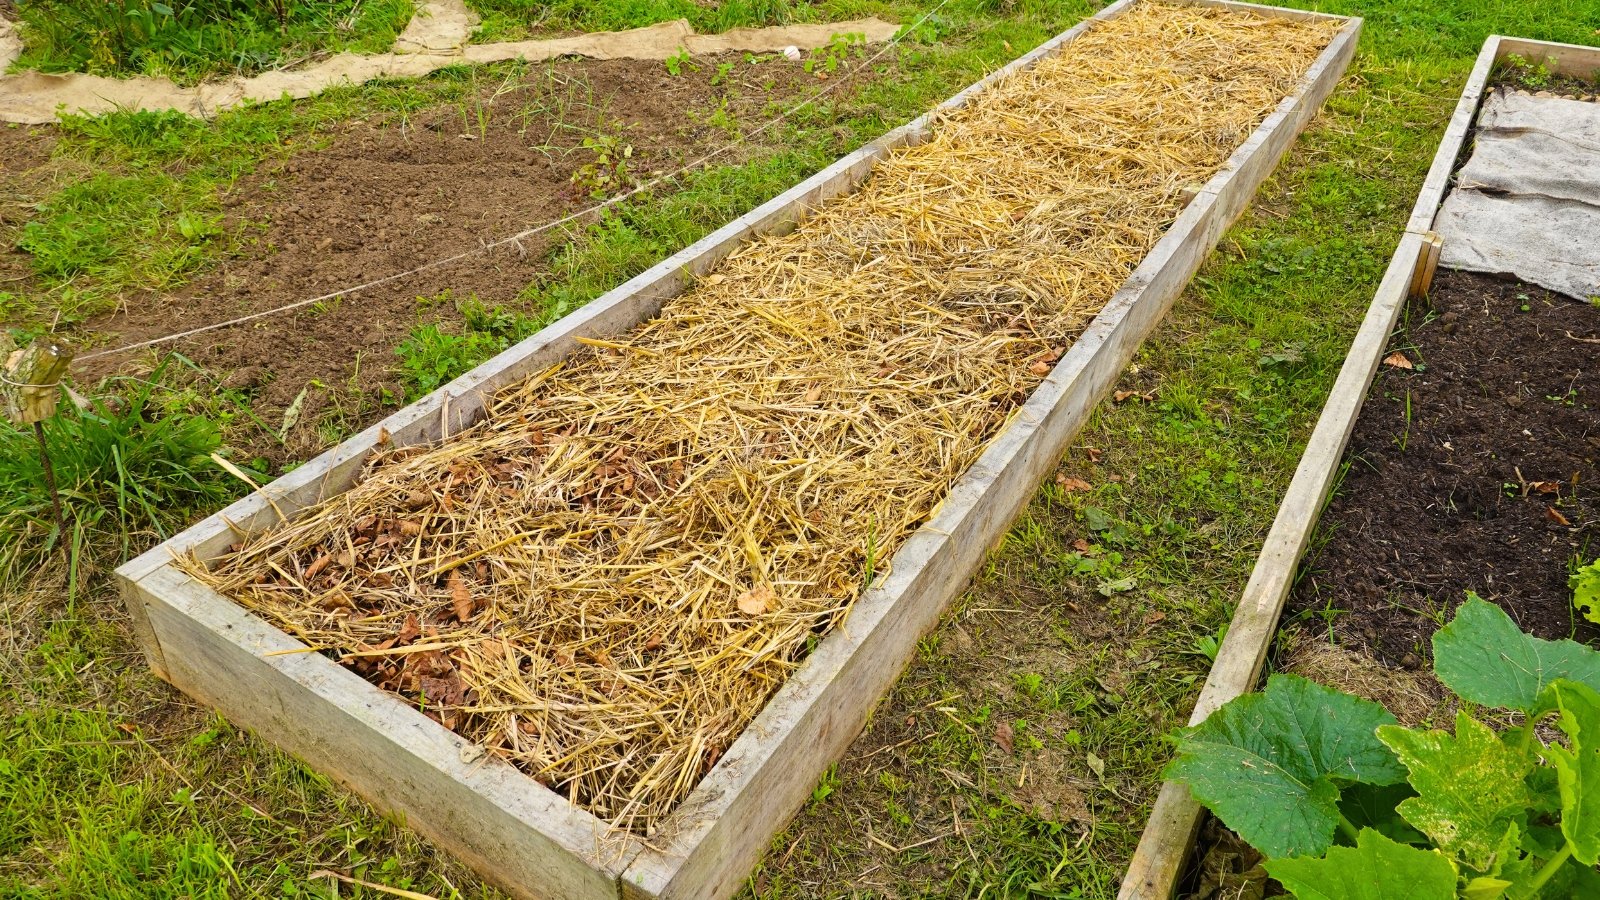
After clearing particles and eradicating tender crops, it’s time to mulch to arrange raised backyard beds for winter. Mulch is crucial in the course of the fall and winter seasons. It insulates the soil whereas it feeds it with natural matter, microbes, and worms.
Mulch is very necessary if you wish to shield marginally hardy crops within the beds. They’ll want insulation round their roots to remain heat regardless of frosts and onerous freezes. Use an natural mulch that’s nutrient-rich, like compost.
Rather than compost, use leaf mildew, straw, coco coir, fallen leaves, or no matter different mulch you will get your palms on. Add the modification in a layer two to 3 inches thick, and rake the floor so it’s even. After including mulch, water it or let rainwater moist it so the mulch incorporates into the soil.
Do the identical in your planters, containers, and in-ground beds. A wholesome backyard has loads of mulch! If the mulch depletes, replenish the backyard with extra to take care of a layer two to 3 inches thick.
Step 4: Plant Chilly-Hardy Crops
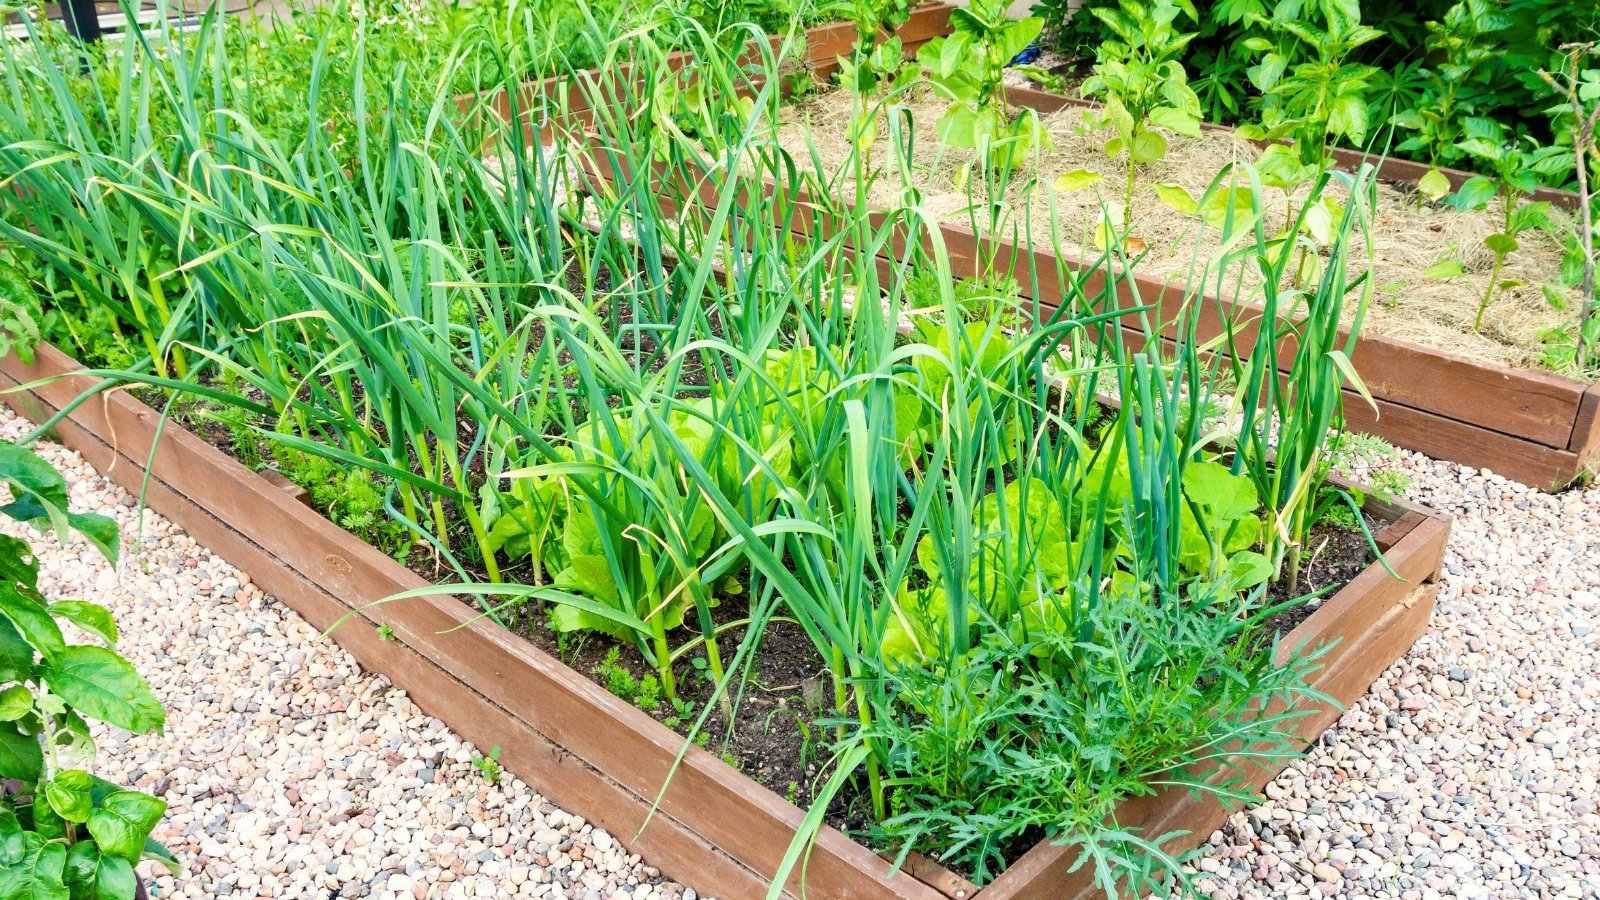
Simply because winter is approaching doesn’t imply you possibly can’t develop greens! Many frost-hardy crops thrive in the course of the cool months, from fall till spring. Use your empty beds to develop garlic, leafy greens, and root greens.
Your current crops can stay from the autumn into the winter in the event that they’re cold-hardy. For those who planted cabbage, kale, carrots, and beets, hold them recent by leaving them in your raised backyard beds. Don’t stuff them in your fridge! Go away them within the backyard, then harvest them while you’re prepared to make use of them.
Or, sow cowl crops. These crops work to shield and insulate the soil, like a residing mulch. Leguminous cowl crops add nitrogen to the soil whereas they develop. Plant fava beans, clovers, oats, rye, and peas.
Step 5: Implement Winter Safety
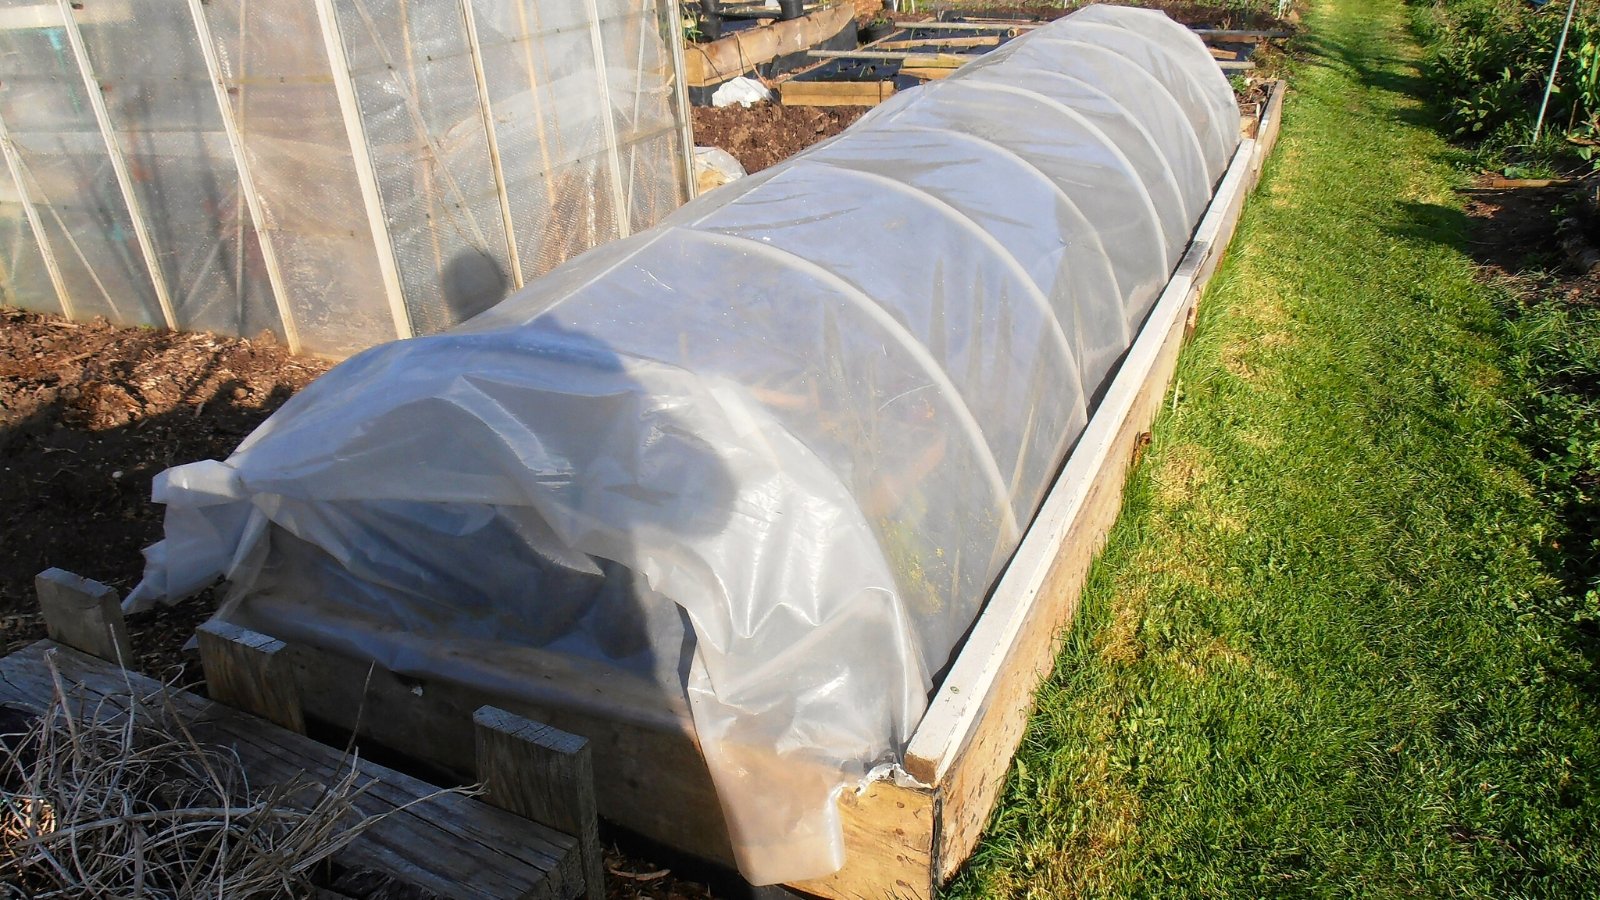
For those who do resolve to develop crops in the course of the winter, you’ll wish to supply them safety within the raised beds. As a result of a mattress is raised from the bottom, it’s simple to add a canopy on high to insulate the crops beneath. Use a frost material, or create mini-hoophouses out of your beds.
Frost material is an affordable materials that’s simple to make use of. It consists of polyester fibers that forestall frost, snow, and ice from reaching the crops beneath. It additionally traps warmth, making a heat zone round your greens.
Use a frost material by draping it over the beds on chilly nights. Pin the sides right down to the bottom across the beds, and use rocks, stones, or bricks to weigh the material down. Take away the fabric on heat days to let the daylight attain the greens, then cowl them once more if the temperature drops.
Greenhouse plastic is extra protecting than frost material. For those who want extra safety, use it in lieu of the polyester cloth. Stick metallic hoops into the raised beds, then pin the plastic onto the hoops. Safe the sides in order that no warmth escapes from the underside of the beds.
Greenhouse plastic isn’t as porous, and it’ll lure the air beneath. Open the flaps within the morning to let air movement by means of, then shut them on the finish of the day to maintain the beds heat at night time.
Step 6: Look ahead to Heat Temperatures

So, you put together the raised backyard beds for winter, add mulch, and plant crops—what now? Now, you’ll have to attend till the bottom thaws within the spring. Not a lot grows when temperatures drop beneath freezing.
Protecting supplies might help you lengthen the seasons, particularly in gentle climates. Test the climate weekly to find out should you can or can’t plant seeds and work the soil.
Most U.S. gardeners might want to wait till late winter or early spring to start working the soil open air. Use this time to order seeds, make new beds, and begin an indoor backyard.
For those who’d prefer to get a head begin on the rising season, plant seeds in pots indoors forward of time. Let the seedlings mature, then harden them off earlier than planting them open air in your raised backyard.
What Else to Do
Raised beds aren’t the one issues you possibly can put together within the fall and winter months. Use this time to raise your panorama so it really works the way you’d prefer it to. Clear particles, recycle clippings, and set the yard to relaxation.
Set Up New Beds

Put all that further particles to good use! Use the lifeless leaves and stems to fill your backyard beds as a substitute of pricy potting soil. Stuff their decrease parts with wooden to use the hugelkultur method, or simply use your lifeless bean vines, corn stalks, and tomato stems.
As a result of natural matter takes time to decompose, now’s the right time to make a brand new backyard mattress. Construct one out of rot-resistant wooden from a cedar or cypress tree, or buy a metallic mattress in your favourite colour.
Fill the mattress with lifeless plant matter, cowl the highest with soil, then add extra mulch on high. The plant matter will decompose in the course of the cool months, and your mattress will probably be prepared for planting subsequent 12 months.
Make Compost

If in case you have sufficient backyard beds, use your particles to make compost! It’s simple sufficient, and there are various methods to make it. Use scorching compost for fast outcomes, or chilly compost should you don’t need to spend so much of effort and time making it.
All composts depend on a correct steadiness of waste supplies. Put together them by including a shovelful of “greens” for each two to 3 shovelfuls of “browns.”
Greens are nitrogen-rich, and browns are wealthy in carbon. Greens include fleshy plant scraps, grass clippings, and kitchen scraps. Browns are issues like fallen leaves and paper waste.