
Alocasias are tropical wonders that carry daring, dramatic foliage to your outside and indoor areas. Although they aren’t frost-tolerant, they make wonderful potted crops, so even in cooler climates, it’s good to have these round. They’re low-maintenance and ideal for patios, sunrooms, and comfy corners.
These tropical beauties are recognizable by their trademark foliage. Alocasia crops have giant, protect, arrow, or heart-shaped leaves that generally attain upward from atop lengthy, robust stems. Their shut relative, colocasia, has an analogous look, however their leaves sometimes level towards the bottom. Each are sometimes referred to as elephant ears.
Alocasia crops are available in many types. Some are stiff and shiny, like ‘inexperienced protect,’ whereas others have a velvety, flocked texture, just like the aptly named ‘Black Velvet.’ Additionally they come in numerous colours and coloration combos. Some have heat, rosy tints, others have darkish leaves with pale, distinguished veins, and there are even a few black leaved cultivars.
As a result of they’re tropical, in most elements of the world, these have to be houseplants for at the least a portion of the yr. Happily, they don’t thoughts this life and are fairly proud of most indoor situations. Preserving them this manner means rising them in pots, and realizing when and tips on how to repot alocasia crops.
Timing it Proper

There are two concerns to make after we discuss when the appropriate time is to repot your alocasia crops. There may be the appropriate time within the development technique of the crops, in addition to time of yr to hold it out. Each are essential, however permitting the plant to let you know it’s the appropriate time is the extra essential of the 2.
Alocasia doesn’t prefer to be root-bound and has a substantial root system. Their roots will in the end develop in circles across the within your container. Crowded roots can result in slowed development, nutrient deficiency, and even root rot from waterlogging. The roots now not have room to broaden, and the soil dries slowly and runs out of vitamins.
You could discover one or two signs of this subject with out truly checking contained in the container. First, you’ll be able to look beneath the pot to see if the roots are rising out of any drainage holes. If they’re, they’re overcrowded. Likewise, if they’re rising above the soil, one other indication is slowed development throughout an lively development interval. This ends in smaller leaves and fewer of them.
In case you discover any of those points, it’s time to repot alocasia crops. For fast-growing varieties, which are typically the bigger ones, this can be yearly. For smaller cultivars, they could be comfy of their container for 2 years. Both method, these do want repotting on a reasonably common foundation.
Relating to the time of yr, spring is greatest. That is when your alocasia crops are waking up from dormancy and getting into a interval of development. Repotting presently permits your crops to recuperate quicker from root disturbance. The warming temperatures and elevated daylight additionally encourage institution of their new container.
Don’t repot in fall or winter, as that is when your alocasia crops are getting into a dormant state. They sluggish their development presently, and the roots are extra weak to emphasize and decay. While you repot, you will want to maintain the soil moist persistently for a while. In winter, your plant’s roots absorb much less moisture and might rot simply.
Measurement Up Your Container

Now, being that they develop into crowded rapidly, you could be inclined to make use of a considerably bigger pot whenever you repot your alocasia crops. I perceive the reasoning, as a result of it technically would reduce down on work, however it’s not the most effective thought. While you repot, you don’t need to go too giant or too small.
Alocasia crops truly desire a comfortable match of their containers. An excessively giant container will maintain an excessive amount of moisture across the roots. This can be a recipe for root rot. The perfect pot leaves sufficient room for the approaching yr or two’s value of root growth, and little else. While you repot, select a container that’s barely bigger than the present one; going up perhaps two inches in diameter is right.
The subsequent essential factor to recollect when deciding on a brand new pot is drainage. Alocasia crops don’t like water standing round their roots. However they do like moist soil. Consequently, plant lovers are inclined to overwater them greater than underwatering.
Along with enough drainage holes, the fabric of the container issues. Terra cotta or unglazed clay is greatest, as they’re porous and permit the soil to breathe. The moisture evaporates quicker from these, and so they have some wicking properties.

Use the Proper Potting Combine
After we select a soil to repot our alocasia crops, we need to look once more on the behavior of their roots. These naturally develop in tropical rainforests the place they’ve organically wealthy soil that drains rapidly and holds moisture. These issues sound counterintuitive, however they’re not.
If you wish to go the simple route, select a potting combine blended for tropical crops. These are sometimes a mix of soil, peat, and pumice, or different mild, ethereal supplies. In case you’re extra inclined to create your personal potting mixtures, you’ll need a mixture that stays moist however drains rapidly,
Use one half standard potting soil so as to add vitamins and retain moisture. Combine in a single half pumice or perlite for aeration and drainage. Then add one half orchid bark, coco coir, or husk chips. These additionally contribute to correct drainage and stop compaction. Your alocasia crops ought to thrive in such a atmosphere.
If you wish to increase the nutrient content material of your soil, you’ll be able to add some compost or worm castings. The ensuing combination ought to really feel springy and coarse. Moisture ought to cross via with out pooling. If the soil dries too quick, add extra soil or coco coir.

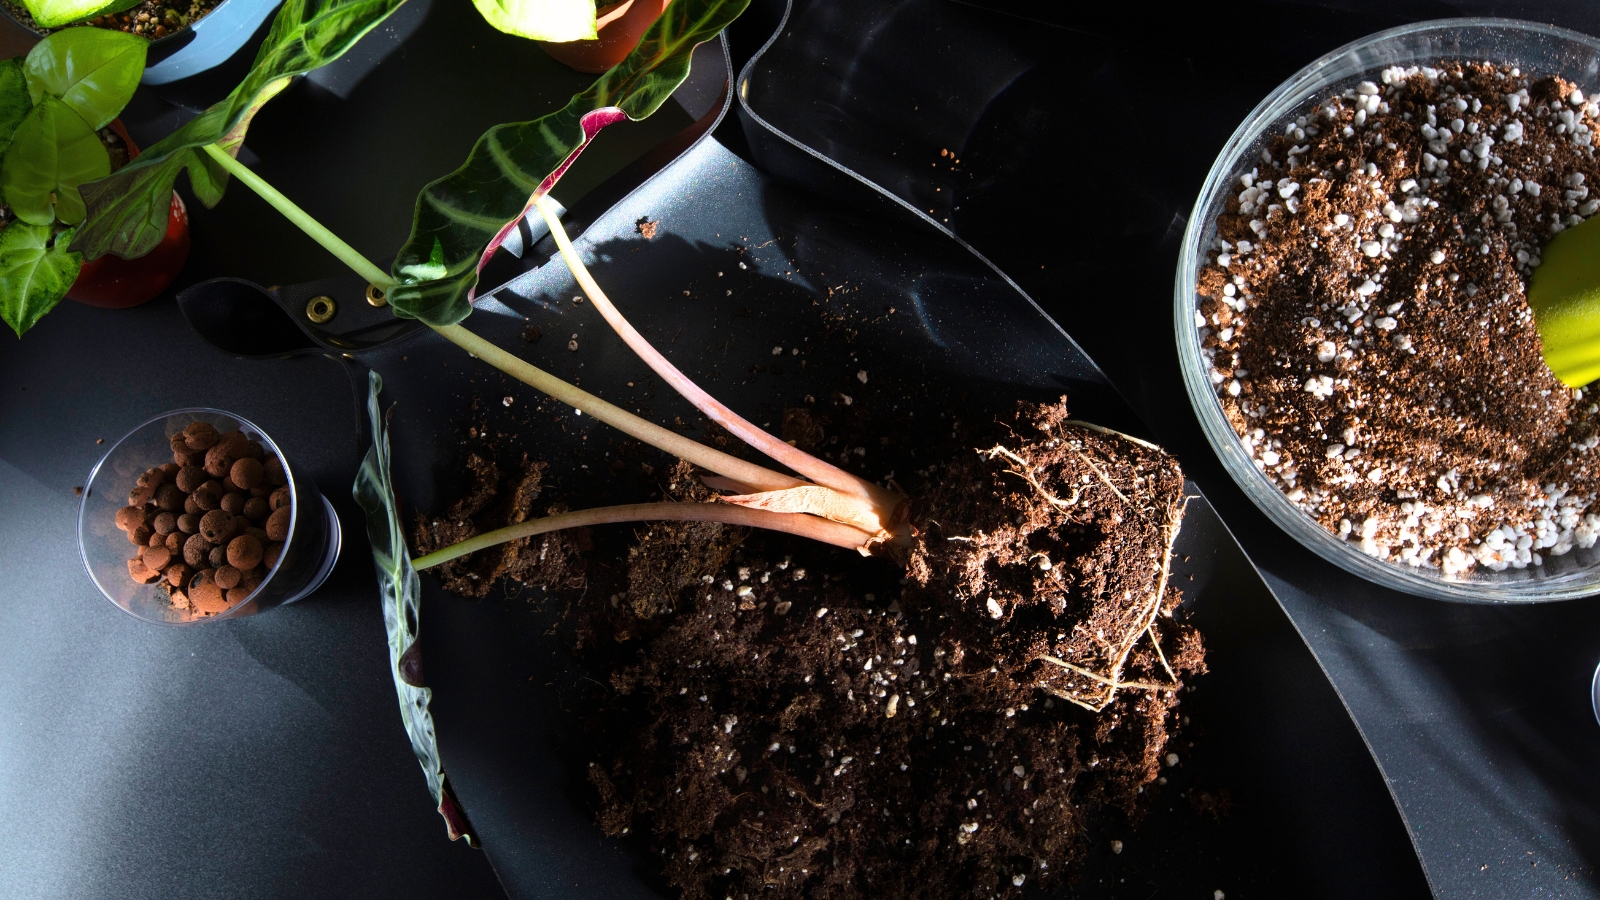
Deal with With Care
While you repot your alocasia, the way you deal with it may well make a giant distinction in how rapidly and the way properly it recovers. Whereas they could seem massive and daring, they’re truly fairly delicate and delicate. It’s greatest to deal with your alocasia with care.
Water your plant the day earlier than you repot. This softens the soil and makes it simpler to slip the foundation ball out of its present container with out tearing the roots. Don’t pull it out by the stems. As a substitute, tip the whole plant on its aspect, and help the bottom whilst you gently work it unfastened.
The basis ball ought to slide out of the pot simply. If not, there could also be some roots caught to the inside partitions. This occurs simply in additional porous pots the place roots can take grip extra simply. They may come away extra simply and cleanly if they’re properly hydrated.
As soon as out of the previous container, loosen and examine the seen roots. Trim away any darkish coloured or mushy parts, as these are probably rotting and can have an effect on different parts of the roots. In case you discover pups forming, you’ll be able to separate and repot these on their very own. They need to have their very own roots and at the least one small leaf forming.
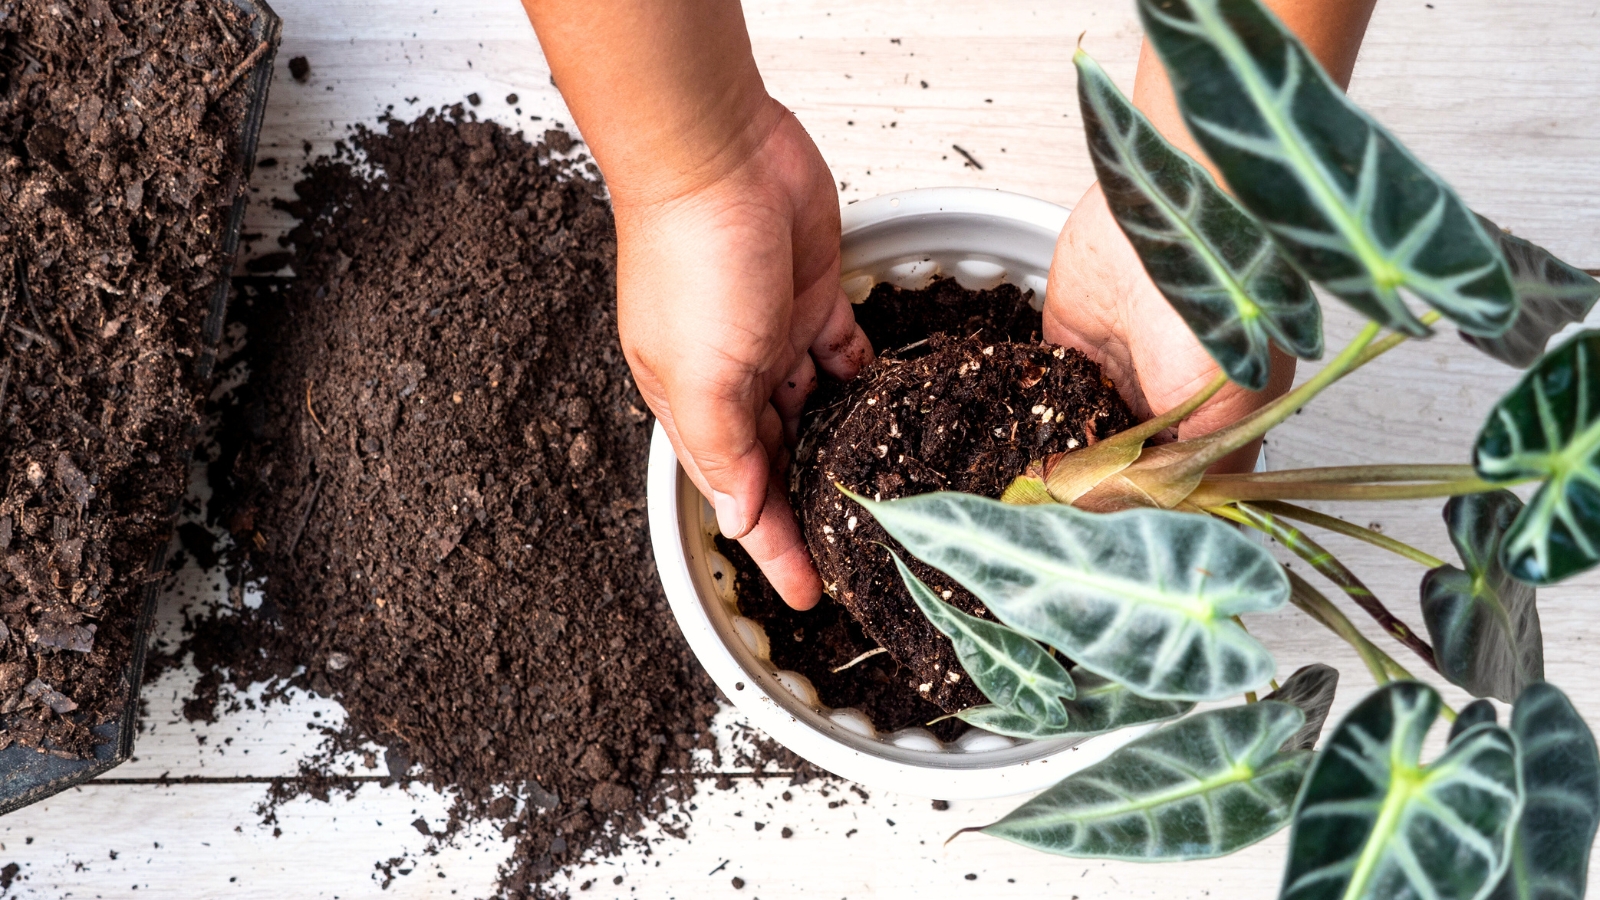
Add a layer of contemporary potting combine to the underside of your new container after which place the rootball on prime. You need the highest of the foundation ball to take a seat on the floor of the soil to stop crown rot. Fill in across the roots with potting combination, and water calmly.
Maintain your repotted alocasia crops in shiny, however oblique mild, and humid situations whereas they recuperate from the method. Watch out about overwatering throughout this time. Don’t be alarmed if a leaf or two turns yellow and falls off as a result of stress. That is regular.