
Whereas out of doors beds may be frozen (or a minimum of, not notably energetic) in January, you possibly can continue to grow indoors by beginning seeds below lights. This offers you sturdy seedlings able to transplant the second spring arrives, extending your rising season dramatically.
Seed beginning below lights additionally opens up prospects that direct sowing outdoors can’t match. You get higher management over rising situations, larger germination charges, and the flexibility to develop varieties that want an extended season than your local weather naturally offers. Plus, there’s one thing satisfying about nurturing vegetation from seed whereas snow falls outdoors.
Mild, heat, and moisture are the necessities for seed beginning, and with some primary gear, you possibly can present all three reliably all through the winter months.
Why Use Develop Lights in Winter

Pure winter gentle isn’t sufficient for many seedlings, even if in case you have south-facing home windows. Day size is brief, and the solar angle is normally low. Seedlings grown in these situations turn out to be leggy and weak as they stretch desperately towards insufficient gentle.
Develop lights clear up this drawback by offering constant, shiny gentle for as many hours as seedlings want. You management the depth, length, and timing reasonably than relying on no matter climate occurs to ship (which is normally clouds while you want solar essentially the most). This produces compact, sturdy seedlings with robust stems and wholesome leaf improvement.
One other benefit is flexibility in placement. You’re not restricted to windowsills or spots with first rate pure gentle. Arrange your seed beginning operation in a basement, spare room, or no matter works on your house. You’ll be able to take over your complete dwelling with seedlings should you like! So long as you may have electrical energy and a flat floor, you possibly can develop.
The funding in develop lights pays off over time, too. High quality lights final for years. While you think about the price of shopping for transplants from a nursery versus rising your personal, lights turn out to be much more economical, particularly should you begin dozens and even tons of of vegetation every season.
What to Sow
Not the whole lot advantages from an early indoor begin in winter. Some vegetation don’t reply effectively to transplanting, or develop so rapidly that beginning them too early simply creates lanky seedlings ready impatiently for the climate to cooperate.
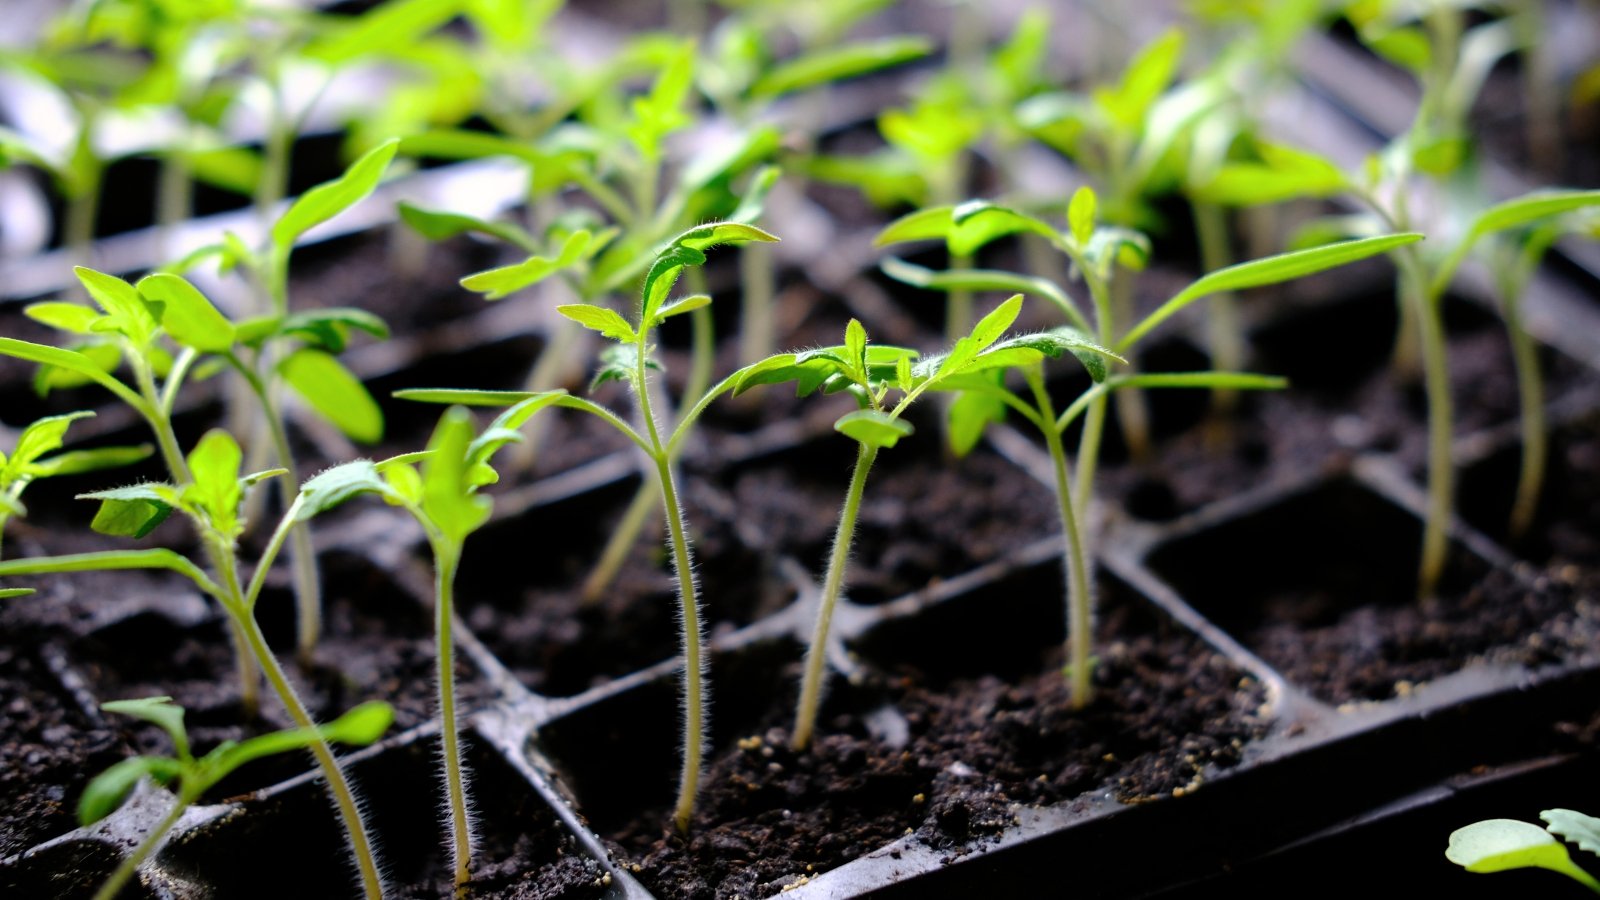
The finest candidates for winter seed beginning below lights are vegetation that want a protracted rising season and transplant effectively. Heat-loving crops like tomatoes, peppers, and eggplants prime the listing, as they received’t fruit with out a substantial head begin in most chilly climates. Herbs like basil and oregano additionally do effectively when began indoors.
Many flowers profit from early beginning too, notably varieties that take some time to succeed in blooming dimension, like echinacea or rudbeckia. Beginning these in winter means potential flowers by summer time reasonably than ready till fall or the next yr.
Rely backward out of your final anticipated frost date to determine when to begin every kind of seed. Beginning too early will give root-bound vegetation that battle after transplanting until you’re ready to up-pot indoors.
Seed Beginning Underneath Lights
Establishing a seed beginning system doesn’t require an enormous funding or difficult gear. The fundamentals are easy: lights, containers, seed beginning combine, and naturally, seeds.
Fill Your Seed Tray
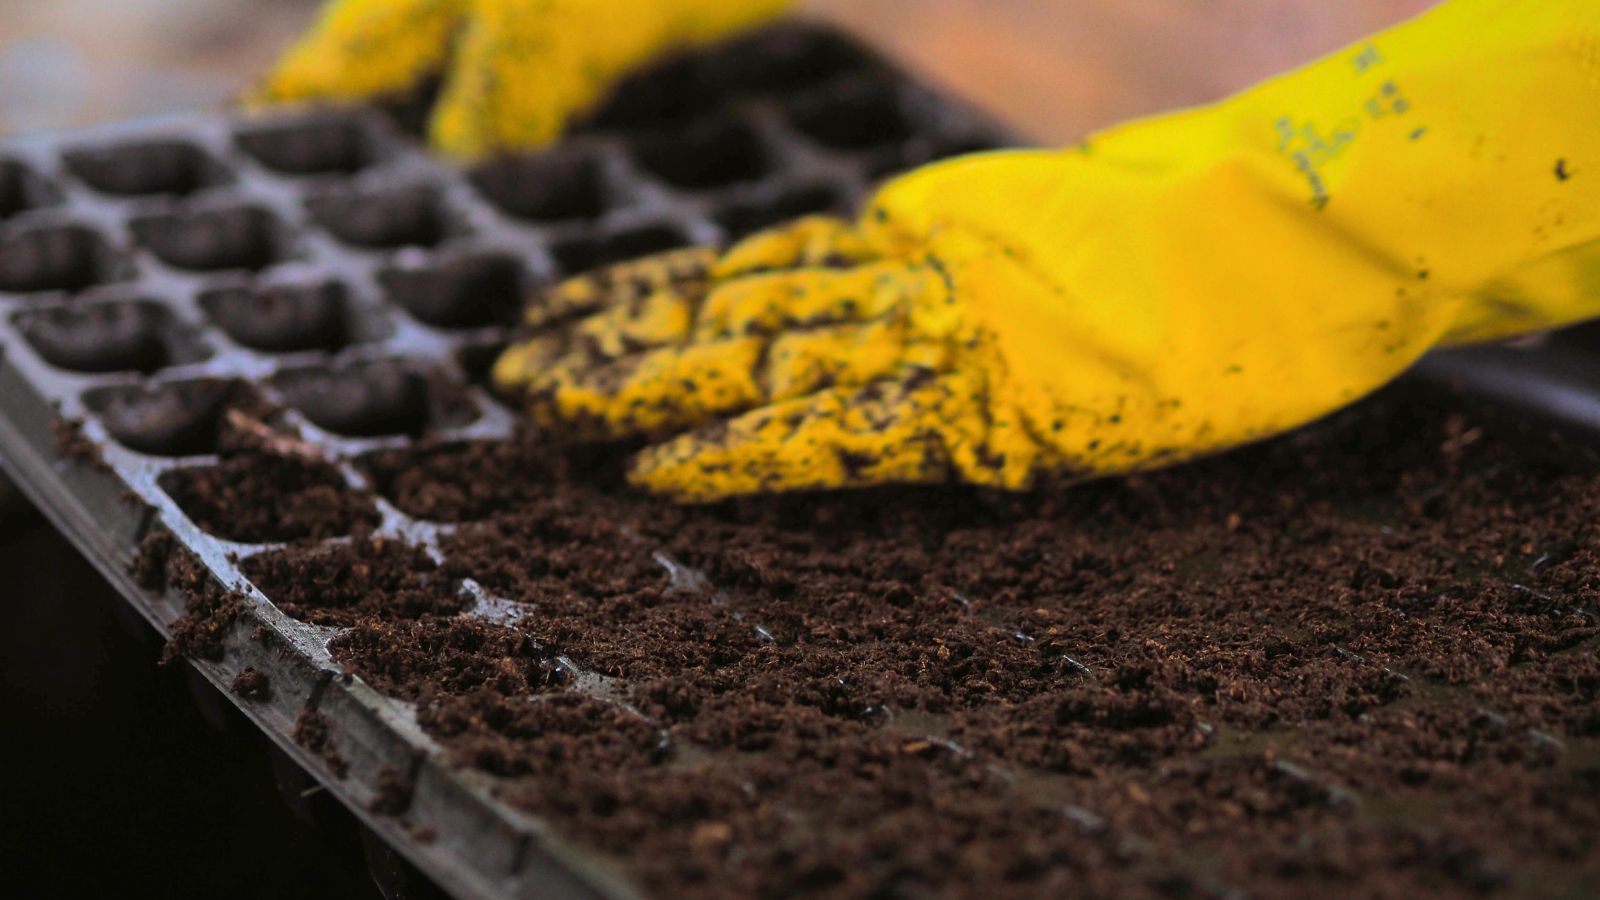
Choosing the proper rising medium makes a major distinction in germination success. Don’t use backyard soil or common potting combine, as each are too heavy for tiny seedlings and will include pathogens.
Seed beginning combine is particularly formulated to be gentle, sterile, and moisture-retentive. It sometimes comprises peat moss or coir, perlite, and vermiculite in varied combos. The wonderful texture permits delicate roots to penetrate simply whereas nonetheless holding sufficient moisture that seeds don’t dry out between waterings.
Fill your seed trays or containers to about half an inch from the highest, then moisten the combo completely earlier than sowing. Press the combo down gently to eradicate air pockets, however don’t compact it. Seeds and roots want some air house to operate correctly. A agency however fluffy texture offers you the perfect of each worlds.
Set Up Your Lights

Place your lights to allow them to be raised simply as vegetation develop. Check your setup by turning the lights on for a full cycle. Verify that your timer works appropriately and that the sunshine protection is even throughout all the rising space.
Temperature impacts germination and development too, so that you may want a warmth mat below trays for warmth-loving seeds. Most seeds germinate finest at round 70°F, although precise necessities fluctuate by species.
Sow Seeds

Together with your trays stuffed and lights positioned, it’s time to really start seed beginning below lights. Observe the depth suggestions in your seed packet. Very tiny seeds typically want gentle to germinate and will simply be pressed gently onto the soil floor reasonably than buried.
I normally plant two or three seeds per cell in my trays, then skinny to the strongest seedling as soon as they’re established. This offers you backup in case some don’t germinate, however it’s worthwhile to be ruthless about eradicating extras so the remaining plant has room to develop.
After sowing, mist the floor flippantly with water or use a really mild spray to keep away from displacing tiny seeds. Cowl the tray with a humidity dome or plastic wrap if in case you have it. This retains moisture constant in the course of the important germination interval. Take away the quilt as quickly as you see sprouts rising so seedlings don’t get too humid and develop fungal points.
Label the whole lot clearly with plant selection and sowing date. You suppose you’ll keep in mind, however when you may have a number of trays going and the whole lot seems like an identical inexperienced sprouts, these labels turn out to be important.
Monitor and Alter

As soon as seeds germinate, your job in seed beginning below lights shifts to upkeep and commentary. Verify seedlings day by day for moisture, development progress, and any indicators of issues creating.
Water is the trickiest a part of seedling care. They want constant moisture however completely can not tolerate soggy situations that result in damping off and root rot. Water when the highest of the soil begins to really feel dry, utilizing room-temperature water and watering from under if potential.
As vegetation develop, alter the sunshine top to take care of that shut distance between leaves and fixtures. Seedlings that instantly stretch or turn out to be pale normally want the lights moved nearer or run for longer hours. Round 12 hours per day is normally sufficient, however you possibly can alter as wanted.
Begin fertilizing flippantly as soon as seedlings develop their second set of true leaves (those that appear to be the precise plant, not the preliminary seed leaves). Look ahead to frequent issues like damping off (seedlings that instantly topple over at soil stage), stretching, or yellowing leaves. Catching points early makes them a lot simpler to appropriate than ready till vegetation are critically struggling.
Transplant

Proceed rising transplants below lights till it’s time to harden them off for out of doors situations. This relies on your local weather and while you began the seeds. The stronger and extra developed they’re earlier than going through the true world, the higher they’ll carry out as soon as transplanted into your backyard.