
It’s not troublesome to develop garlic. The allium’s bulb grows underground, whereas its leafy foliage sprouts above the soil. Half of garlic rising success depends on selecting the best selection in your area.
Go for hardneck garlic varieties in chilly, northern climates. Hardneck varieties want low temperatures over the winter to type wholesome bulbs. In heat, southern climates, go for softneck cultivars. They fare higher in areas with out onerous freezes and frosts.
Regardless of which cultivar you select, you possibly can efficiently develop garlic in containers, planters, or raised beds. Study precisely what it must thrive, and provides it the care it wants for a profitable residence harvest.
Maybe you lack the area to develop bulbs underground, otherwise you solely have room in your porch or patio. Regardless of how huge or small your area is, it’s doable to develop garlic in containers. These steps will information you thru the method, from planting to reap.
Step 1: Decide the Proper Planters
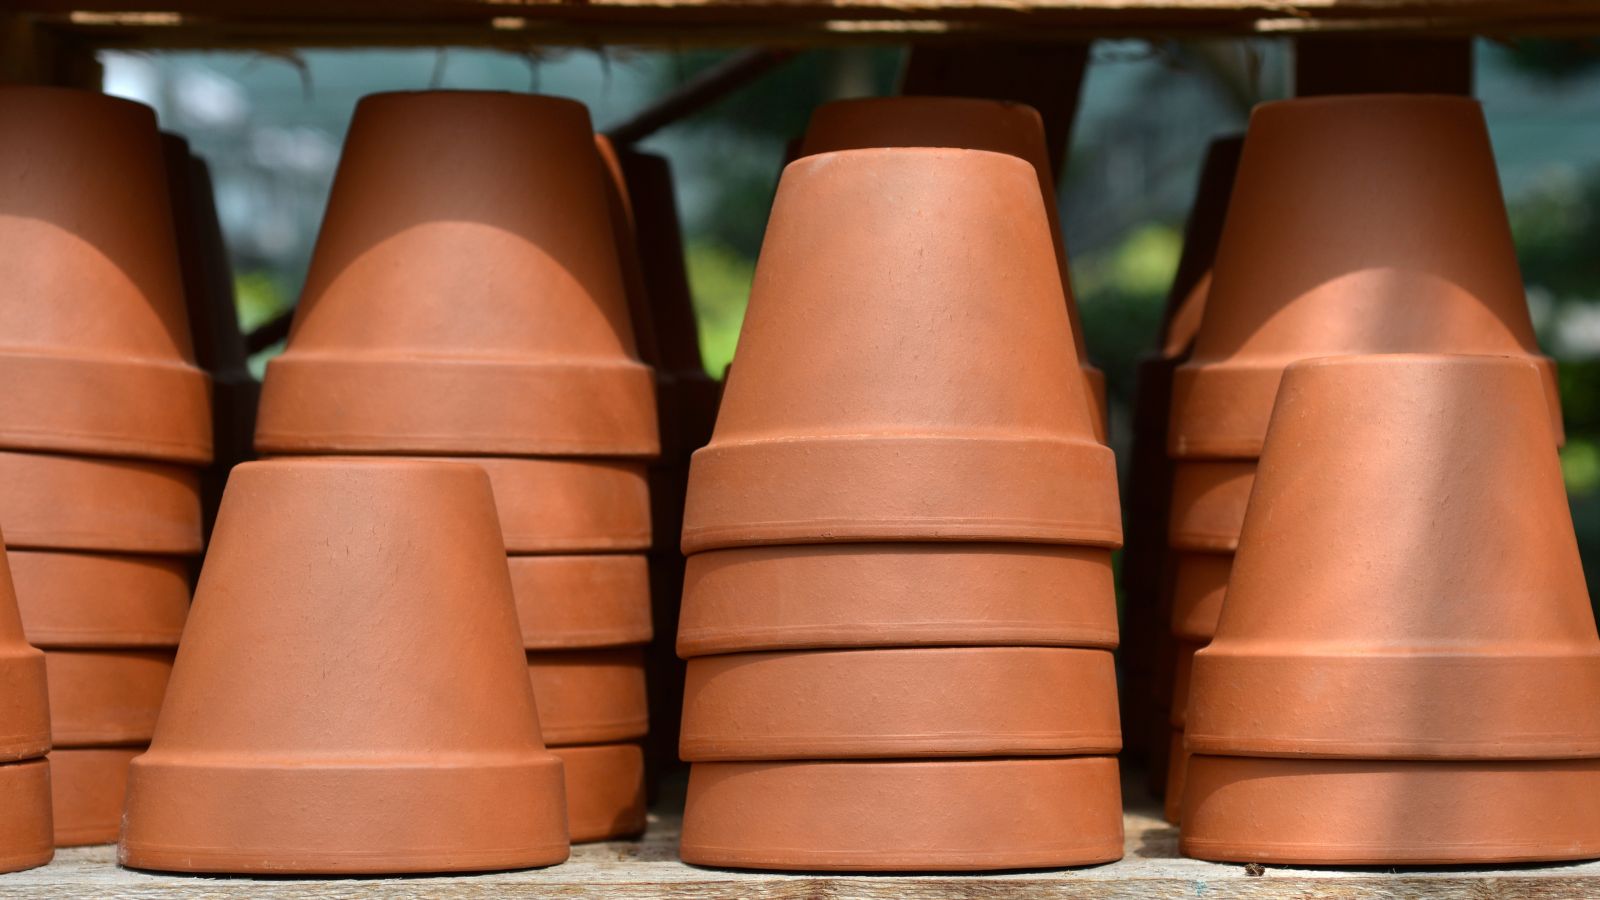
As a result of garlic is a root crop, it wants a deep container to develop properly. The roots want room to unfold, and a deep pot has enough area for them to develop. Shallow pots will result in cramped roots and poor yields.
To develop garlic in containers, select containers eight inches or deeper in your cloves. Two- or three-gallon pots are enough. Bigger pots, like five- and ten-gallon sizes, can maintain multiple clove.
Plastic containers are low cost to supply, although they’re fast to warmth up within the summertime. Select clay, ceramic, or terra cotta pots to supply higher drainage and airflow, and to guard your crops from sweltering warmth through the heat months.
Step 2: Discover Seed Garlic

A wholesome planting begins with the correct cloves. Seed garlic is a time period that refers to cloves that growers use for planting. They sprout into equivalent clones of the bulb they got here from.
Most industrial growers buy seed garlic from a good supply. It’s greatest to purchase the cloves from certifiable sources, as they assure that the inventory is illness and pest-free.
Or, attempt sourcing garlic from a neighbor or pal! If you realize different gardeners, it’s possible in addition they develop this root crop of their residence. They might have a number of cloves they’re prepared to reward you.
The ultimate choice is to use garlic from the grocery retailer. Although not the most suitable choice, it’s a good way to chop prices. Retailer-bought garlic could have progress inhibitors on it that forestall sprouts from rising. Get round this subject by shopping for natural bulbs for planting.
Step 3: Plant Cloves in Autumn
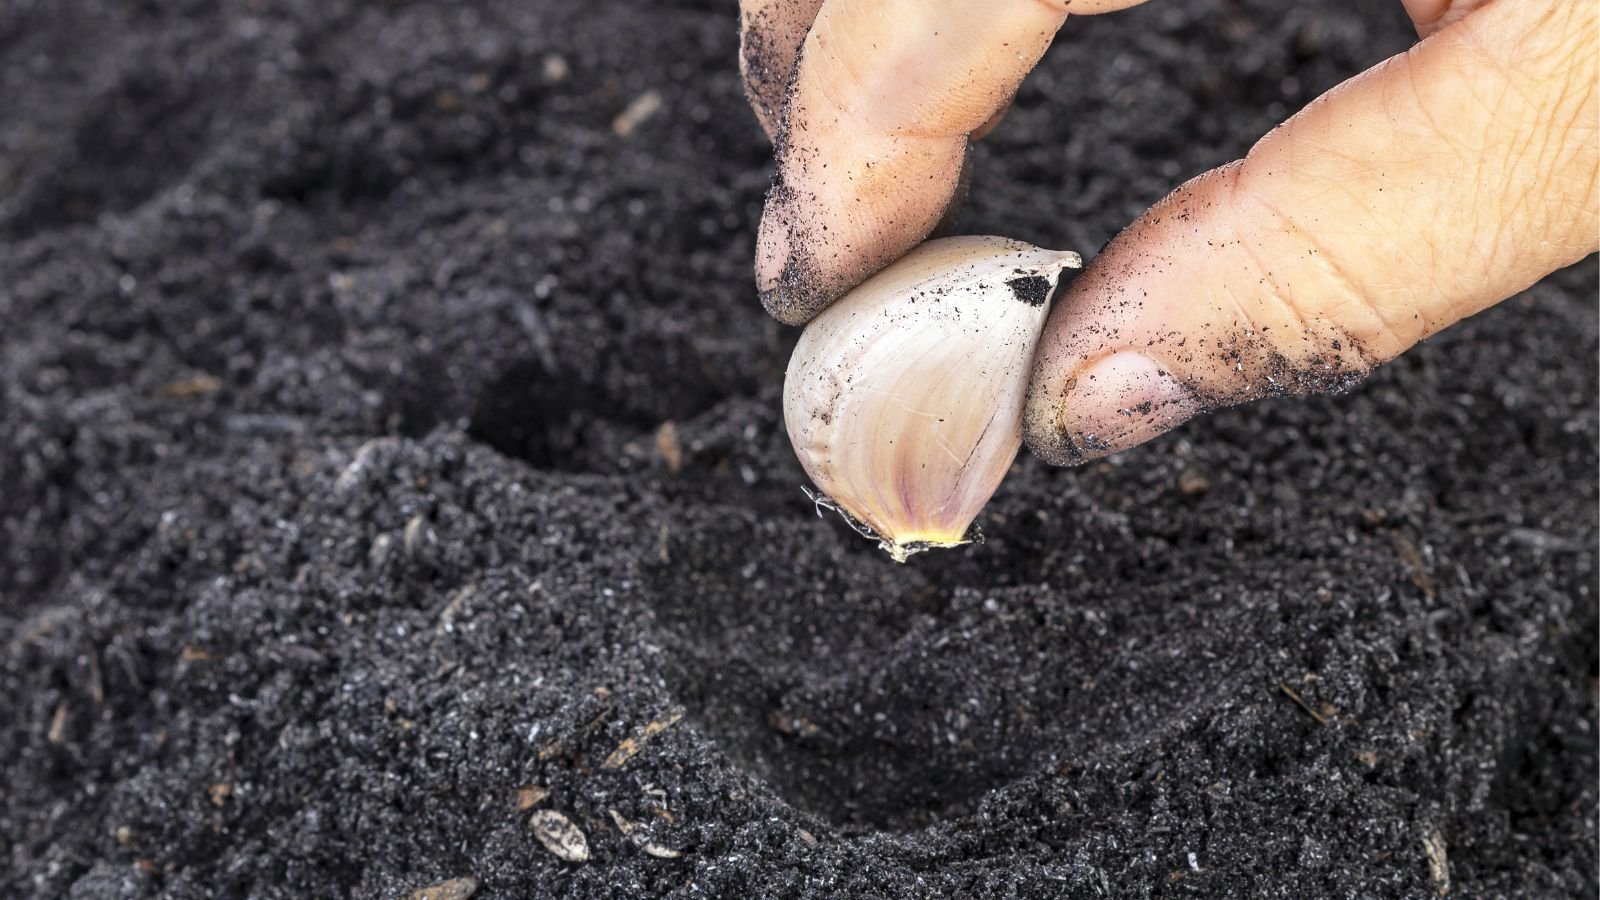
The most effective time to develop garlic in containers is fall, when the times are shortening and temperatures are cooling. The cloves use the winter’s chilly to separate every clove into a number of items. Then, when the climate warms, every bit swells right into a full-size clove.
The clove gained’t divide in case you plant it too late. It’ll swell right into a single, giant, and spherical bulb, referred to as snow garlic. The spherical tastes identical to the traditional bulbs, but it surely lacks particular person cloves with paper skins. You’ll must retailer the leftovers within the fridge.
Plant garlic from September by way of November, earlier than onerous freezes arrive in your area. In case you reside in a heat, frost-free area, retailer the cloves within the fridge for 2 to a few months earlier than planting them through the cool season.
To plant, bury every garlic clove an inch to an inch and a half deep within the pots. House them three to 6 inches aside from one another. Add water to the pots to assist the filth settle.
Step 4: Overwinter Containers

Pots present much less insulation than raised and in-ground beds. They sit above the soil, and chilly temperatures are fast to freeze them. You’ll want to guard them this winter to ensure a profitable harvest subsequent summer time.
Begin by including mulch on high of the filth. Use compost, or discover another like leaf mould, straw, or fallen leaves. Place the compost in a layer two to a few inches thick, and tamp it down to assist it keep in place.
Frost fabric, or a row cowl, is a simple technique to supply safety throughout onerous freezes or frosts. Merely drape it over the pots and crush the perimeters with stones or bricks. Then, take away the fabric through the day to let daylight and recent air in.
Discover frost fabric at backyard facilities and panorama provide shops. Or, use an outdated bedsheet as an alternative! It’ll do the trick. An alternative choice is to drape blankets across the pots like a Christmas tree skirt for additional insulation on heat nights.
Lastly, you might also retailer the pots in an unheated storage to develop garlic in containers. The storage will get chilly sufficient to advertise correct bulbing with out freezing the roots.
Step 5: Look after Sprouts
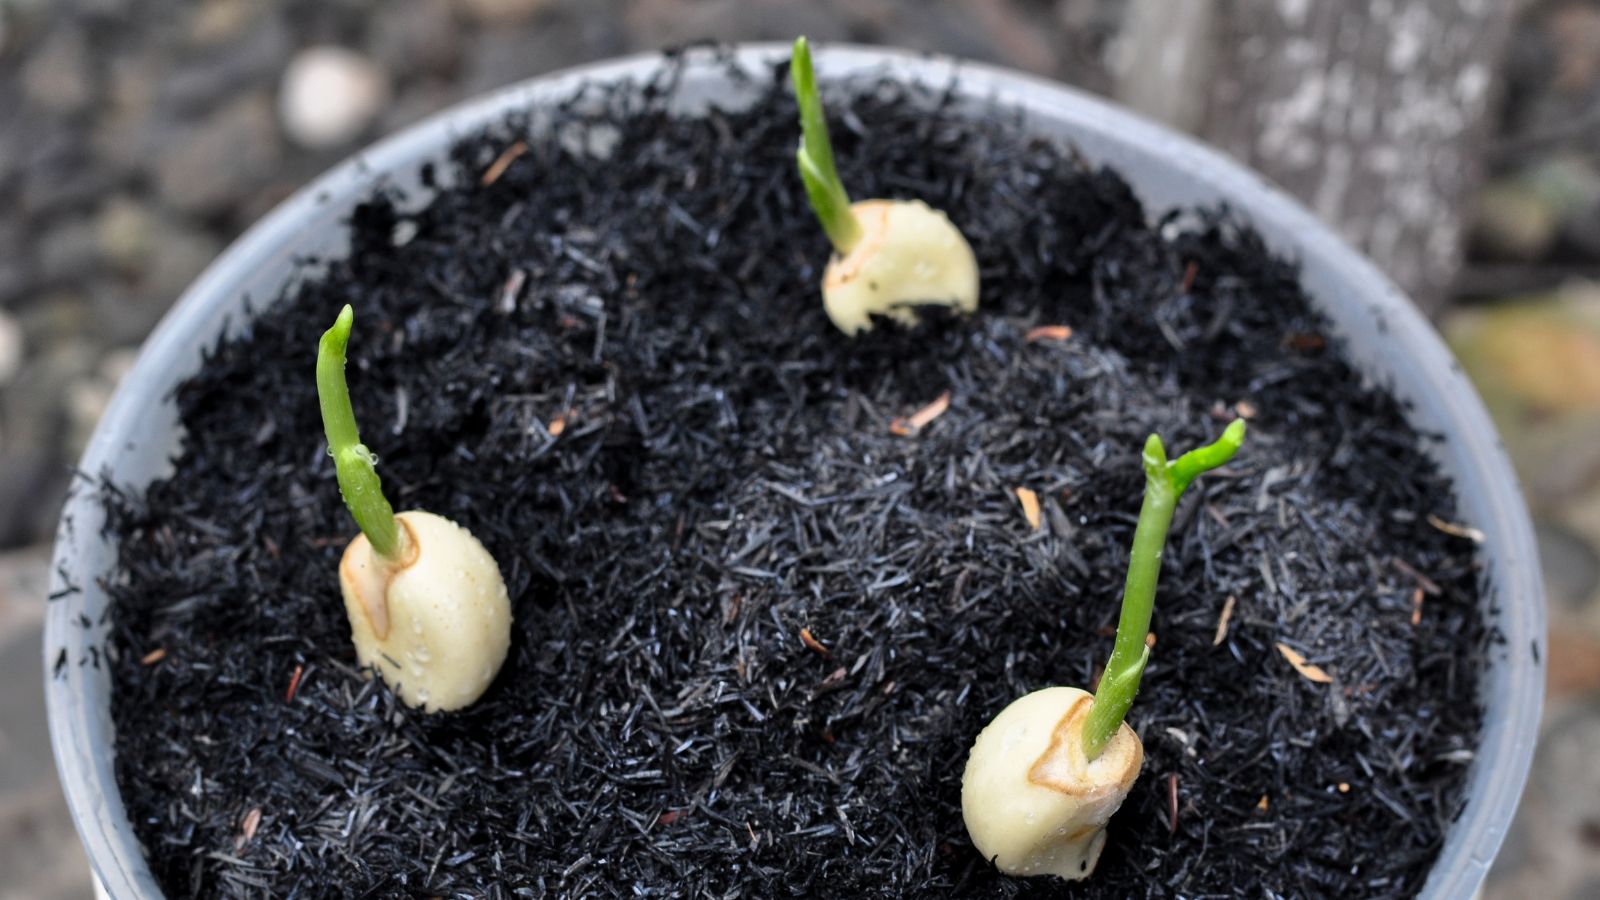
You gained’t see sprouts till late winter or early spring. As soon as the times start lengthening and warming, the shoots will sprout from underground and poke above the soil. When you see inexperienced leaves, it’s vital to transfer the pots someplace they’ll obtain full solar.
Full solar equates to 6 or extra hours of every day direct daylight. Alongside full solar, give the sprouts common water. Irrigate the containers after the soil floor dries. In case you’re uncertain, use your finger to prod the filth and see how moist or dry it’s.
Hardneck varieties sprout scapes that pull power from bulb-formation. Snip or choose the scapes off, and cook dinner them in stir-fries or sautés. They’ll develop bulbils in case you depart them on the vegetation.
In comparison with different vegetation, garlic is comparatively problem-free. Look ahead to mites on the leaves, and look out for fungal circumstances that have an effect on the bulbs under floor.
Step 6: Harvest Prepared Bulbs
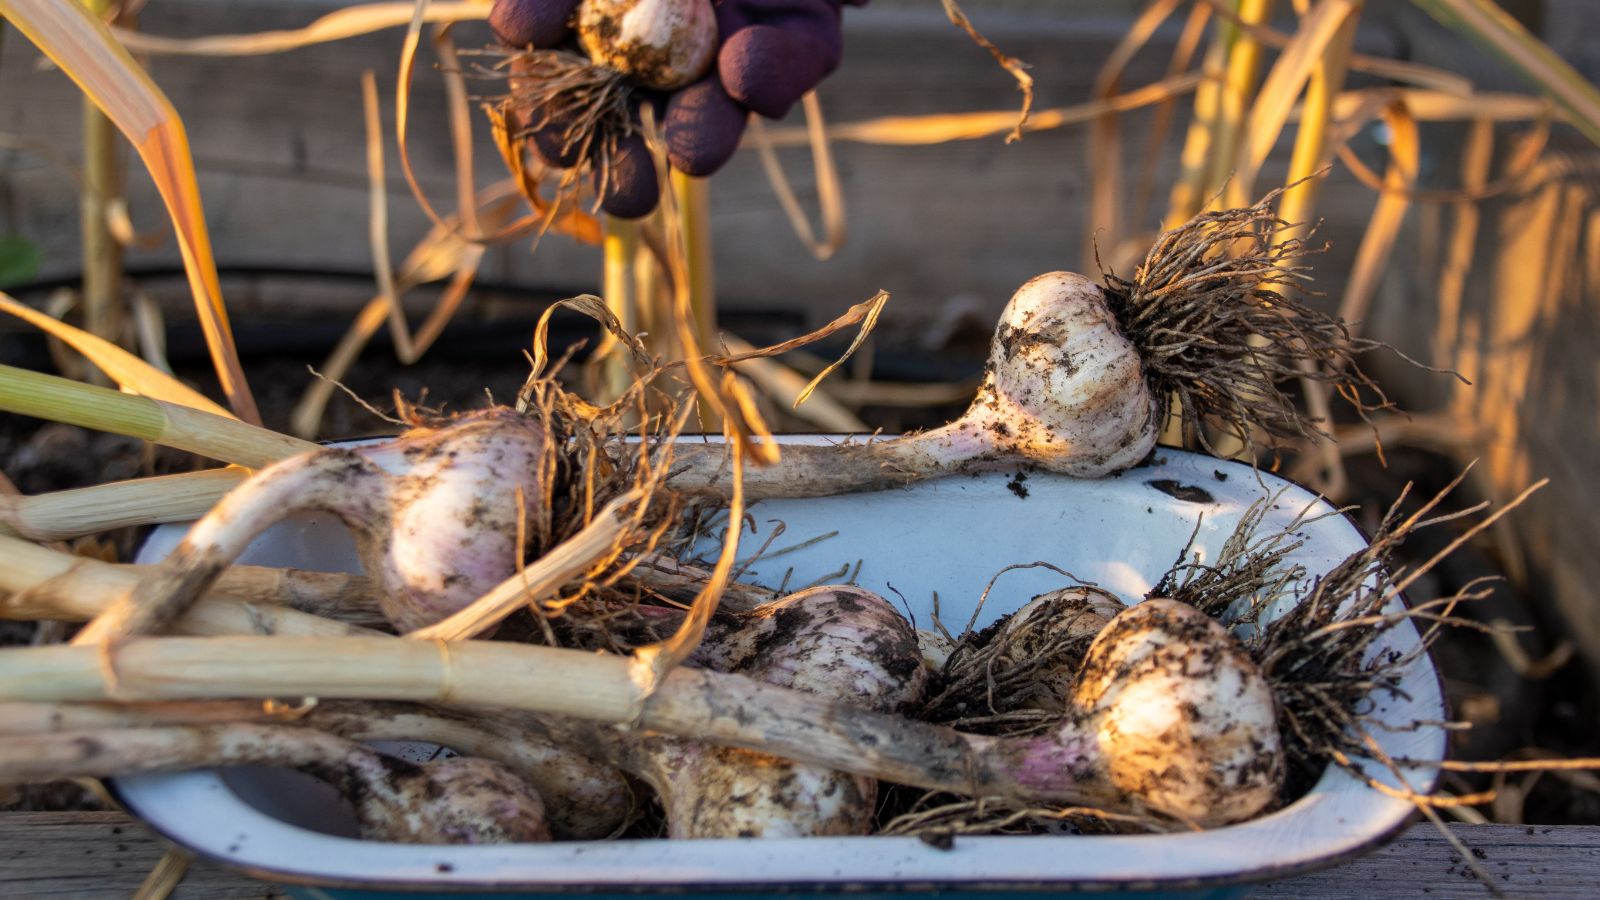
Most varieties take eight to 9 months to mature after planting. Wait till the vegetation’ decrease leaves flip yellow, then pull one as much as see how huge or small it’s. If the bulb is of a great measurement, chances are you’ll harvest the remainder of the crop.
Most gardeners will harvest the prepared bulbs in June or July. Don’t dig close to the stalks, as you would possibly puncture the bulbs within the course of. As a substitute, use a pitchfork to stab under the garlic. Then, raise gently upwards to dislodge the roots from the filth.
Seize the vegetation from the soil and collect all of them collectively. They should dry and treatment earlier than they’re prepared for long-term storage.
Step 7: Remedy and Retailer Garlic
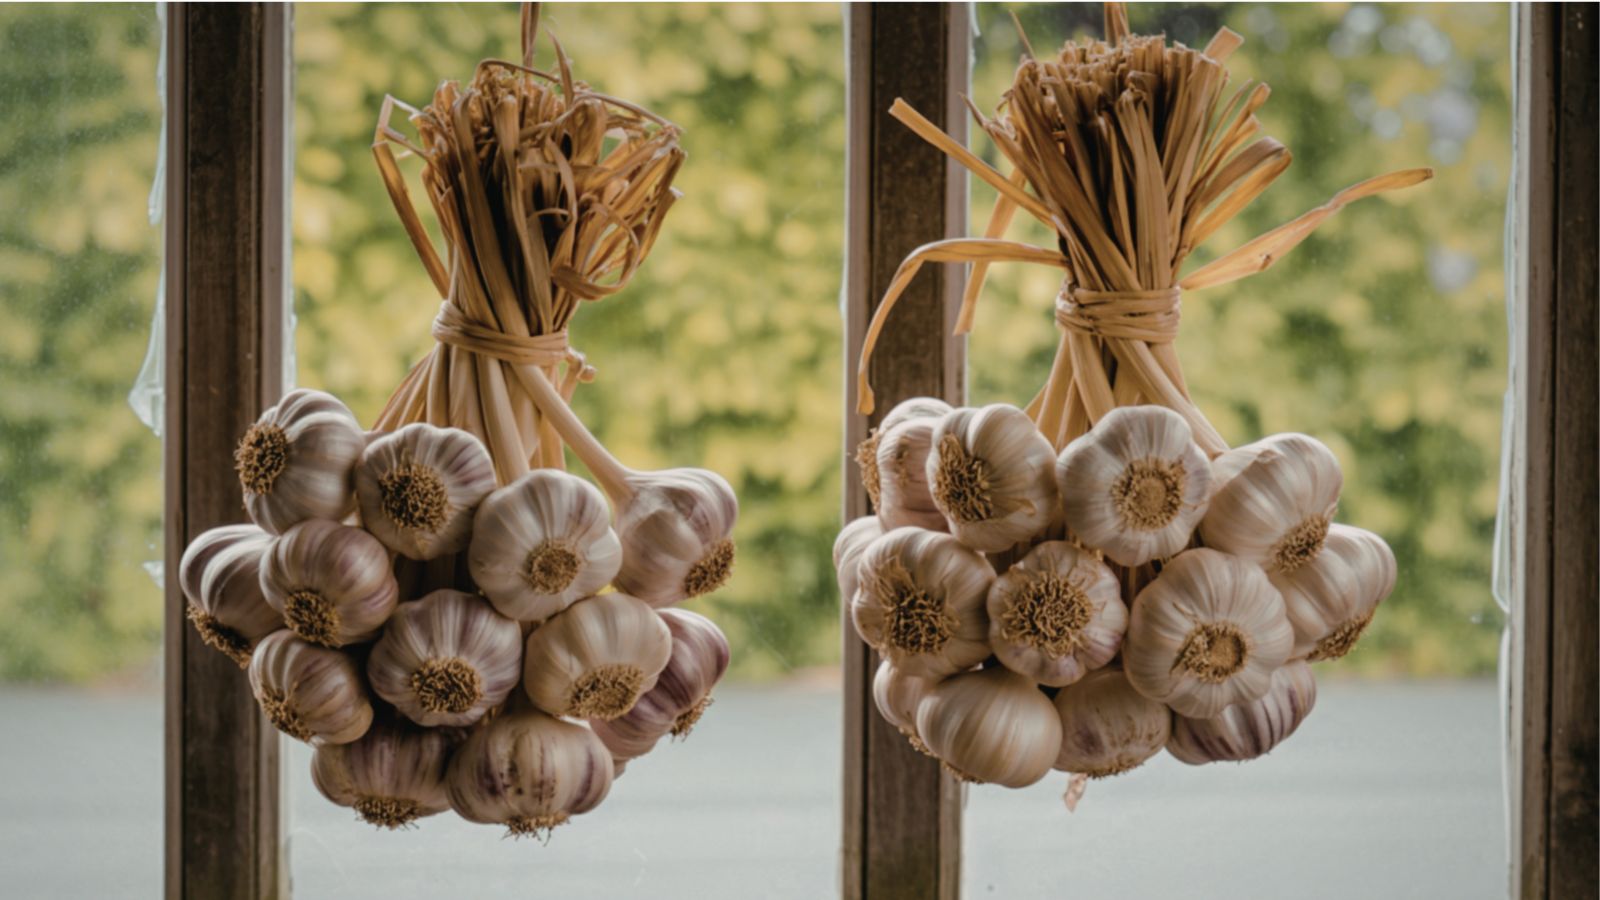
Curing is a course of that prepares your harvest for storage, serving to it final till you’re prepared to make use of it. There are a number of methods to do that, although the best approach is to hold the vegetation to dry. The skins will thicken and switch papery to create a protecting layer between the cloves and the atmosphere.
A intelligent and fairly technique to treatment softneck varieties is with braiding. Chances are you’ll braid the floppy stalks collectively to create intricate bunches of weaving leaves and hanging bulbs. Then, cling the bunches to dry in a location with common airflow away from direct daylight.
I develop hardneck varieties, and I zip-tie the vegetation collectively and cling them by their leaves. You may additionally set them on mesh screens or metallic trays to treatment.
After every week or two, the bulbs are prepared for storage. Snip off the useless leaves, leaving an inch of stalk hooked up above every cluster. Retailer the garlic in a cool, darkish, and dry location, like a pantry or cellar.
Key Takeaways
Regularly Requested Questions
Sure, it’ll! The foundation crop will thrive as long as the pots are eight inches or deeper.
Sure, as long as you shield it from harsh freezes and frosts.
Sure, you possibly can, though you gained’t develop giant cloves. The vegetation want chilly temperatures to type bulbs. Develop them indoors for edible leaves.